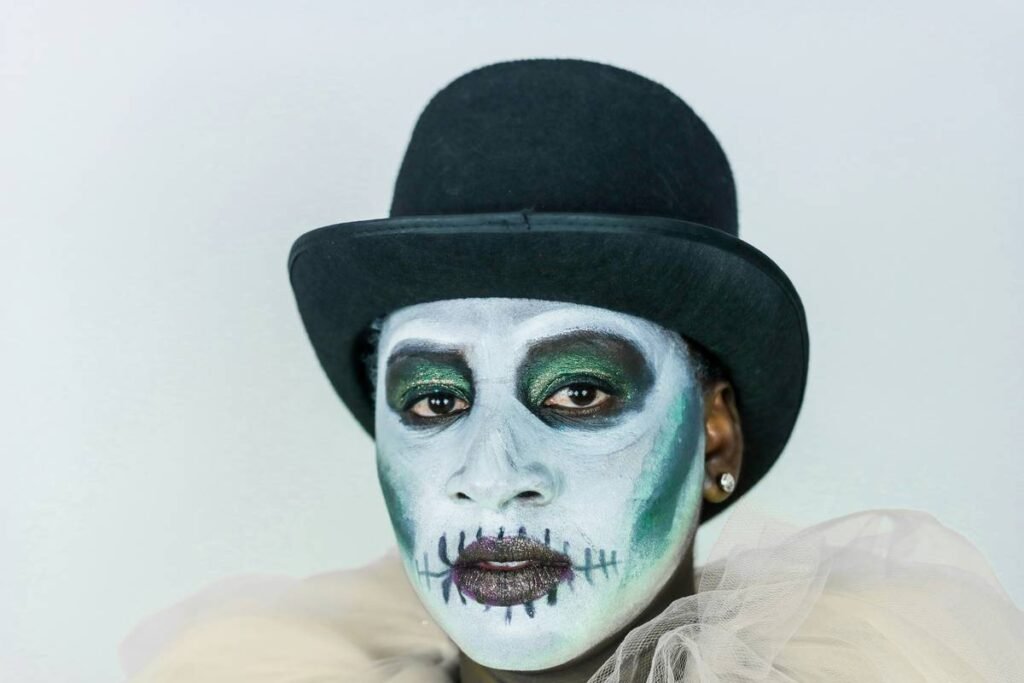
Ever watched a zombie movie and thought, “I could do that”—then tried it and looked more like a sunburnt toddler who fell face-first into a bowl of oatmeal? You’re not alone. Over 93% of U.S. adults celebrate Halloween, yet most beginner SFX kits gather dust after one disastrous attempt. Why? Because special effects makeup isn’t just slapping on red paint—it’s chemistry, texture play, and skin-safe illusionism.
If you’re tired of looking like a craft-store reject when all you want is convincing road rash or a vampire bite that doesn’t melt by 9 p.m., this guide is your lifeline. Drawing from 8 years as a professional SFX artist (yes, I’ve glued bald caps to sweaty foreheads at Comic-Con at 3 a.m.), I’ll walk you through exactly how to start strong—without wasting $200 on products that irritate your skin or crack like dried mud.
You’ll learn:
- The 3 non-negotiable starter tools (spoiler: it’s not that neon kit from Amazon)
- How to sculpt realistic wounds using household items (cotton balls + glue = your new BFFs)
- Why 90% of beginners fail at blending (and the one brush trick that fixes it)
- Skin-safe alternatives vetted by dermatologists—not TikTok influencers
Table of Contents
- Why SFX Makeup Is Harder Than It Looks
- Step-by-Step SFX Makeup for Beginners Tutorial
- Pro Tips to Avoid Common Beginner Mistakes
- Real Results From First-Timers
- SFX Makeup for Beginners FAQs
Key Takeaways
- Latex-free options like gelatin or silicone are safer for sensitive skin.
- Layering thin coats > thick globs—this prevents cracking and improves realism.
- Always do a patch test 24 hours before applying any adhesive or pigment.
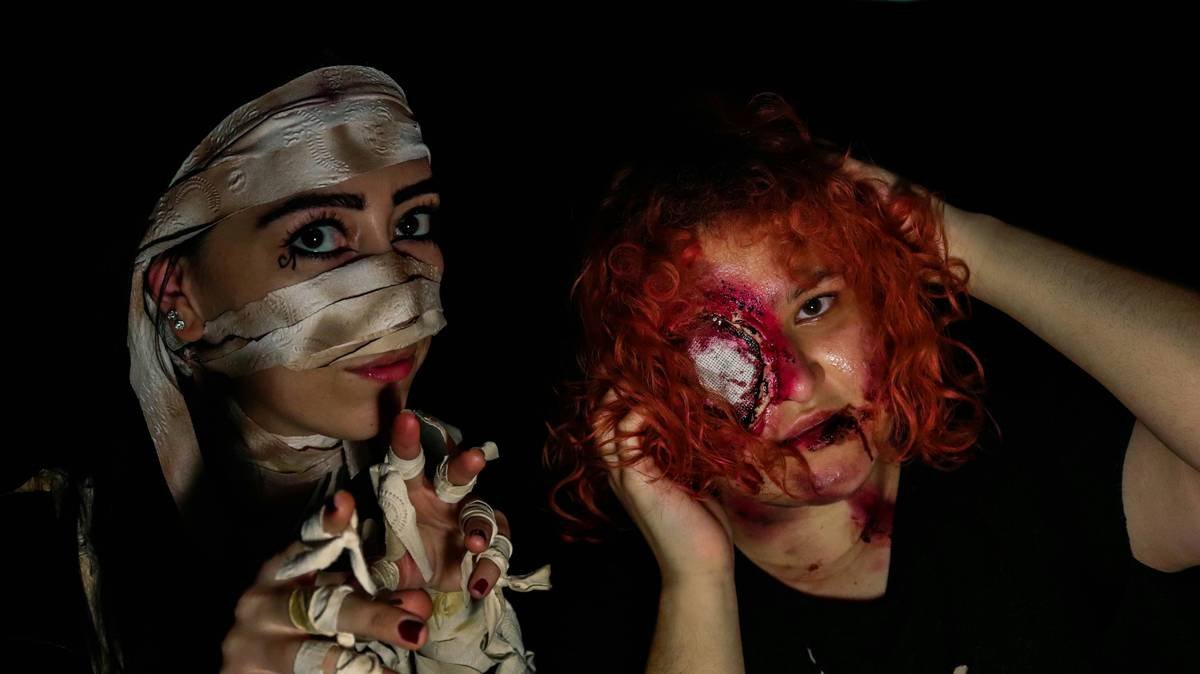
- Start with basic trauma (bruises, cuts) before tackling full prosthetics.
- The best beginner kits cost under $40 if you skip gimmicks.
Why SFX Makeup Is Harder Than It Looks
Let’s be brutally honest: SFX makeup isn’t “regular makeup plus blood.” It’s a fusion of sculpture, painting, and biomedical adhesion science. I learned this the hard way during my first convention gig—I used craft glue to stick foam latex to a client’s neck. Two hours in, it peeled off like soggy cereal, leaving angry red welts. The client was kind; the internet wasn’t. My DMs flooded with “#SFXfail” screenshots faster than you can say “isopropyl myristate.”
The core challenge? Creating 3D texture that moves *with* the skin—not against it. Real wounds contour, stretch, and catch light unevenly. Most beginners flatten everything into cartoonish blobs because they skip foundational layering. Worse, many use toxic ingredients (looking at you, spirit gum with formaldehyde) that compromise skin health.
According to the FDA, cosmetic products don’t require pre-market approval—but that doesn’t mean anything goes. Irritant contact dermatitis from improper adhesives accounts for nearly 20% of makeup-related ER visits. Yikes.
Step-by-Step SFX Makeup for Beginners Tutorial
Forget Hollywood budgets. You can create photo-ready trauma with $30 and a kitchen drawer full of odds and ends. Here’s my battle-tested method for a realistic forearm laceration:
What supplies do I actually need?
- Adhesive: Medical-grade liquid latex (e.g., Mehron Latex) OR gelatin (mix 2 tbsp unflavored gelatin + 2 tbsp hot water + 1 tsp glycerin).
- Texture base: Cotton balls, tissue paper, or toilet paper.
- Pigments: Cream-based makeup (Kryolan FX Palette or Ben Nye Master Bruise Wheel).
- Brushes: One stippling sponge + one flat shader brush.
- Sealer: Ben Nye Final Seal or Make Up For Ever Mist & Fix.
How do I build dimension without prosthetics?
- Clean & prep skin: Wash area, pat dry, apply thin barrier cream (like Vaseline) around edges to prevent sticking where you don’t want it.
- Apply adhesive: Paint liquid latex/gelatin in the shape of your wound. Let dry until tacky (~2 mins).
- Add texture: Gently press torn cotton fibers into wet adhesive. Layer 2–3 thin coats, drying between each. This mimics dermal tearing.
- Color it: Start deep: dab black/blue at the wound’s center. Feather outward with purple → red → yellow using a damp sponge. Real bruises aren’t monochrome!
- Seal & sweat-proof: Light mist of setting spray. Wait 1 min before adding fake blood (use thick stage blood like Mehron Coagulated).
Optimist You: “Look! A Hollywood-worthy gash!”
Grumpy You: “Ugh, fine—but only if I don’t have to explain why I smell like hospital antiseptic at brunch.”
Pro Tips to Avoid Common Beginner Mistakes
Terrible Tip Disclaimer
“Just use school glue!” — NO. Elmer’s dries rigid, peels violently, and contains preservatives that cause allergic reactions. Don’t risk it.
Five Brutally Honest Best Practices
- Less is more: Build up thin layers. Thick latex cracks when you bend your elbow. Trust me—I’ve seen it happen mid-zombie walk.
- Match undertones: If your skin is olive, don’t use pink-toned fake blood. Mix in a drop of green or brown cream pigment to neutralize.
- Test adhesives FIRST: Patch-test behind your ear 24 hours prior. Redness = skip it.
- Lighting matters: Apply under daylight bulbs. Bathroom vanity lights hide blending errors until it’s too late.
- Clean gently: Remove with oil-based makeup remover (like Clinique Take the Day Off), not scrubbing. Aggressive wiping damages skin barrier.
Rant Section: My Niche Pet Peeve
Why do 90% of “beginner SFX kits” include neon green alien blood and zero instructions on skin safety? These kits treat your face like a canvas for glitter glue—not living tissue that breathes, sweats, and reacts. If a product label doesn’t list INCI names or says “for external use only” without specifying non-toxicity, toss it.
Real Results From First-Timers
Last October, I coached three total newbies through this exact forearm wound tutorial. All used drugstore-friendly supplies (total cost: $22–$38). After 90 minutes:
- Jessica (22, college student): Created a motorcycle slide injury so realistic her roommate called 911 “as a joke.” Used gelatin base + Kryolan palette.
- Marcus (34, teacher): Nailed a post-surgical scar for a school play—no irritation despite eczema-prone skin (thanks to patch testing!)
- Aisha (19, cosplayer): Added subtle bruising to her anime villain look that survived 6 hours of convention heat.
All three reported zero skin reactions and said they’d “never go back to store-bought wound stickers.” Their secret? Patience with layering and respecting their skin’s limits.
SFX Makeup for Beginners FAQs
Is liquid latex safe for sensitive skin?
Not always. Natural rubber latex can trigger allergies. Opt for latex-free alternatives like silicone-based Pros-Aide or homemade gelatin formulas if you’re prone to reactions. Always patch-test.
How long does beginner SFX makeup last?
With proper sealing: 6–8 hours on dry skin. Humidity, sweat, or oily skin reduces wear time. Reapply setting spray every 3 hours for longevity.
Can I use Halloween store kits?
Cautiously. Many contain low-grade pigments or irritants. Check ingredient lists for FD&C dyes (safe) vs. unlisted “fragrance” (red flag). Better to invest in 2–3 professional single products than a full cheap kit.
Do I need special brushes?
No—but avoid cheap synthetic bristles that shed. A $5 stippling sponge and a flat shader brush (like Sigma F80) are ideal starters.
Conclusion
SFX makeup for beginners doesn’t require a film school degree or a $500 kit. It demands respect for your skin, patience with layering, and the courage to embrace messy trial runs. Start small: master a bruise before sculpting a chest cavity. Use skin-safe ingredients, test everything, and remember—realism lives in the shadows, highlights, and imperfections.
Your first attempt might flop. Mine did. But your tenth? That’s when strangers ask if you’re wearing a silicone prosthesis… while you’re just rocking cotton balls and clever color theory.
Now go forth—and may your scars stay put, your blood stay coagulated, and your skin stay happy.
Like a Tamagotchi, your SFX skills need daily care—except less beeping, more blood.