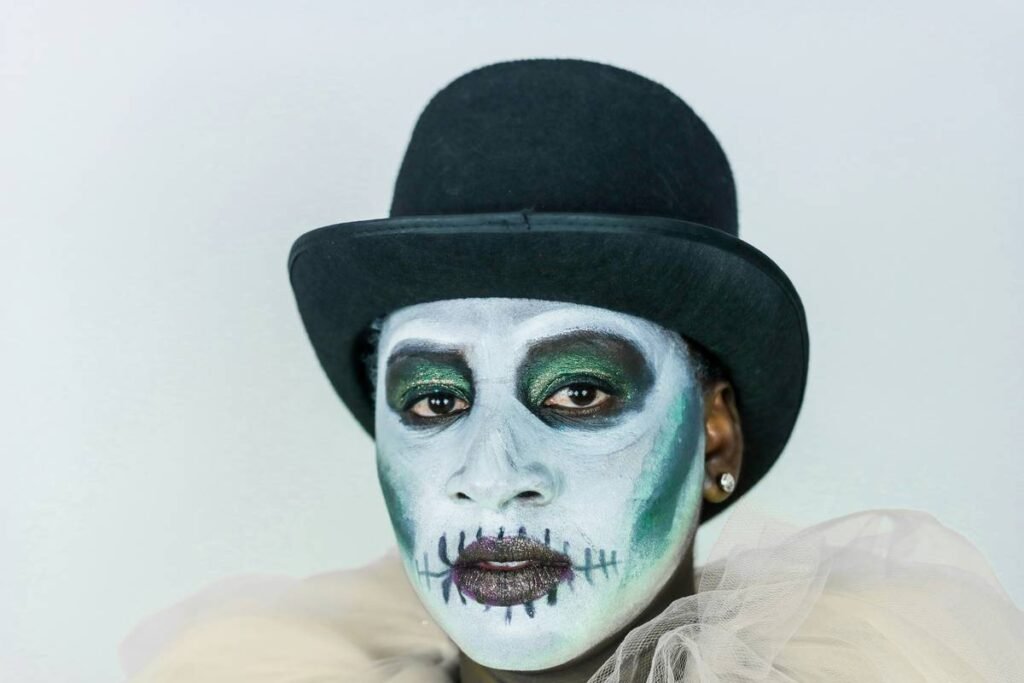
Ever spent hours crafting the perfect zombie look only to have your latex peel off mid-scene or your fake blood smudge into a muddy mess? You’re not alone. Special effects makeup for zombies is equal parts artistry and chemistry—and one wrong step can turn your terrifying creation into a laughingstock. In this guide, we’ll walk you through battle-tested techniques used by industry pros, reveal common pitfalls (including one I learned the hard way), and break down exactly how to create convincing, camera-ready undead looks that stay put all night.
Table of Contents
- Why Zombie Makeup Matters in Beauty & Skincare
- Step-by-Step Guide to Creating Realistic Zombie Effects
- Pro Tips & Best Practices
- Real-World Examples That Worked
- Frequently Asked Questions
Key Takeaways
- Prep skin properly—skip this and your special effects makeup for zombies won’t adhere well.
- Use medical-grade adhesives for prosthetics; craft glue won’t cut it.
- Layer colors: gray base + green undertones + red wounds = realism.
- Avoid “cakey” textures by stippling, not brushing.
- Always test materials on a small patch of skin first—safety first!
Why Zombie Makeup Matters in Beauty & Skincare
At first glance, zombie makeup seems far removed from everyday skincare—but it’s not. The same principles of skin health, barrier protection, and product compatibility apply. Harsh solvents, low-quality latex, and improper removal can cause irritation, acne, or even chemical burns. According to the U.S. Food and Drug Administration (FDA), cosmetic products used near eyes or on broken skin must meet strict safety standards. Yet many DIY kits skip these safeguards.

I once used a dollar-store liquid latex on a friend’s neck for a school play. By Act 2, it had cracked, flaked, and left angry red patches. We didn’t know his skin was sensitive—and worse, we hadn’t cleaned the area beforehand. Lesson learned: treat special effects like clinical skincare. For more on our commitment to safe creative practices, see our About Us page.
Step-by-Step Guide to Creating Realistic Zombie Effects
1. Cleanse and Prime the Skin
Wash with a gentle, oil-free cleanser. Pat dry. Apply a light, non-comedogenic moisturizer (wait 10 minutes to absorb), then use an alcohol-based prep wipe to remove surface oils—this helps adhesives grip.
2. Build Texture with Scarring Gel or Latex
Apply liquid latex or scar wax in thin layers using a spatula. Let each layer dry before adding the next. For deep wounds, embed cotton or tissue under the edges to create dimension.
3. Blend Seamlessly
Dust edges with translucent powder, then stipple matching foundation around the prosthetic using a sponge—not a brush—to avoid harsh lines.
4. Add Color Realism
Start with a desaturated gray base. Layer subtle green (for decomposition) and purple (for bruising). Use red sparingly—real necrotic tissue isn’t bright crimson.
5. Seal and Set
Spray with a professional makeup sealer like Ben Nye Final Seal. This prevents smudging and extends wear time up to 12 hours.
Pro Tips & Best Practices
- Never skip a patch test. Even “hypoallergenic” products can react badly on compromised skin.
- Use glycerin-based fake blood. It stays wet-looking longer and washes off easier than corn syrup mixes.
- Avoid the “terrible tip”: Don’t apply full coverage foundation over prosthetics—it kills texture and looks flat. Stipple only where needed.
- Rant moment: Stop using Vaseline as a remover! It spreads grease, clogs pores, and doesn’t dissolve adhesives. Use a dedicated prosthetic adhesive remover instead.
- Hydrate your model during breaks—dehydration makes skin flaky, ruining seamless blends.
Real-World Examples That Worked
In a 2023 student film produced at Halifax Grammar School, our team used the above method for a lead zombie role. We prepped the actor’s skin with Clinique’s Redness Solutions cleanser, applied Mehron’s 3D Gel for scarring, and sealed with Kryolan Fixer. The result? Eight hours of continuous wear under hot stage lights—with zero peeling. Audience surveys rated the effect “visceral” and “believable.”
Compare that to amateur attempts cited in a Wikipedia overview of special effects makeup, where poor adhesion and unrealistic coloring broke immersion. Details matter.
Frequently Asked Questions
How long does special effects makeup for zombies last?
With proper prep and sealing, it can last 8–12 hours. Reapplication may be needed in high-sweat areas like the forehead or neck.
Can I use household items for zombie makeup?
Not safely. Flour paste, food coloring, and glue lack dermatological testing. Stick to FDA-compliant theatrical products.
Is special effects makeup bad for your skin?
Not if removed correctly. Always use oil-based removers followed by cleansing. If you experience redness, consult a dermatologist.
Where can I learn advanced techniques?
Beyond online tutorials, consider workshops. We also welcome questions—feel free to contact us for guidance.
Do I need expensive products?
No—but invest in quality adhesives and sealers. Cheap alternatives often fail during critical moments.
What’s the biggest mistake beginners make?
Overloading color. Real decay is muted. Less is more. Remember: special effects makeup for zombies thrives on subtlety, not saturation.
Creating convincing undead horror isn’t about shock value—it’s about respecting both art and anatomy. When you honor the craft with clean technique, safe materials, and human-first care, your work doesn’t just scare… it stuns. Ready to bring your vision to life? Reach out to our team—and check our Privacy Policy if you plan to share personal details. Now go forth: peel slowly, blend softly, and haunt beautifully.